Sunday 31 August 2014

Scrambled Quail Eggs with Wee Willie Winkie Sausages

Scrambled quail eggs with mini cocktail sausages and deep fried potato skins

If you are in the UK and you think of sausages, egg and chips, you will not probably conjure up in your mind an image much like the one above! You are more likely of course to think of chips, bangers and a fried egg. While this dish is very different, it is essentially however still sausages, egg and chips. It came about in the first instance when I was thinking of a way to cook the remaining quail eggs I had from my recent gift pack (see an earlier post). I wanted to cook them in a way I had never cooked quail eggs before, so I decided to try them scrambled.

Probably the main reason why we wouldn't automatically think of scrambling quail eggs is because they are of course so small. I used eight of them in this dish and the resultant scrambled egg quantity probably wasn't even as much as would be provided by two chicken eggs. As the eggs are so small, I decided to use small cocktail sausages to serve with them and instead of making conventional homemade chips, I thought deep fried potato skins may work well as part of the combination. I'm glad to say that although the finished dish was probably more of a starter/appetizer in terms of quantity than a main course, it was really, really tasty.  

Parboiling potato skins

Ingredients

Skins from 2 medium sized baking potatoes (or as required)
Salt
6 Wee Willie Winkie sausages (or similar cocktail sausages)
Vegetable oil for frying
8 fresh quail eggs
Little bit of butter
White pepper
Malt vinegar
2 or 3 shredded basil leaves to garnish

Parboiled potato skins ready to be chilled

Directions

When you're peeling the potatoes, it's a good idea to try and slice the skins off as evenly as possible. I always use a knife for peeling potatoes and never a vegetable/potato peeler. I find it much easier. That is of course down to personal preference.

Put the skin pieces in to a pot of cold, salted water and bring to a simmer for five minutes. Drain well through a colander, allow to steam off for five more minutes then refrigerate in a plastic dish for at least an hour to chill.

Wee Willie Winkie mini cocktail sausages

The Wee Willie Winkie (or similar) sausages should be gently fried in a little oil over a low to medium heat for about ten minutes, turning frequently.

Gently frying Wee Willie Winkie Sausages

Quail eggs are awkward to deal with in any way because they are so small. The best way I've found to break them is with the blunt edge of a reasonably thick bladed table knife.

Fresh quail eggs

Break the quail eggs straight in to a small saucepan. Don't worry about breaking a yolk or two - they are soon going to be a lot more broken! If you do get any shell in the pan, wet your fingers in cold water and press them on the bits of shell and they will stick to your fingers. Add a little bit of butter but don't season at this stage.

Quail eggs ready for scrambling

Start the potato skins deep frying in a deep pan of very hot oil (or your deep fryer) before you start scrambling the quail eggs.

Deep frying potato skins

Put the quail eggs pan on to a low to medium heat. Begin stirring with a wooden spoon and don't stop. Every twenty seconds or so, remove from the heat but keep stirring, so as the eggs don't overcook.
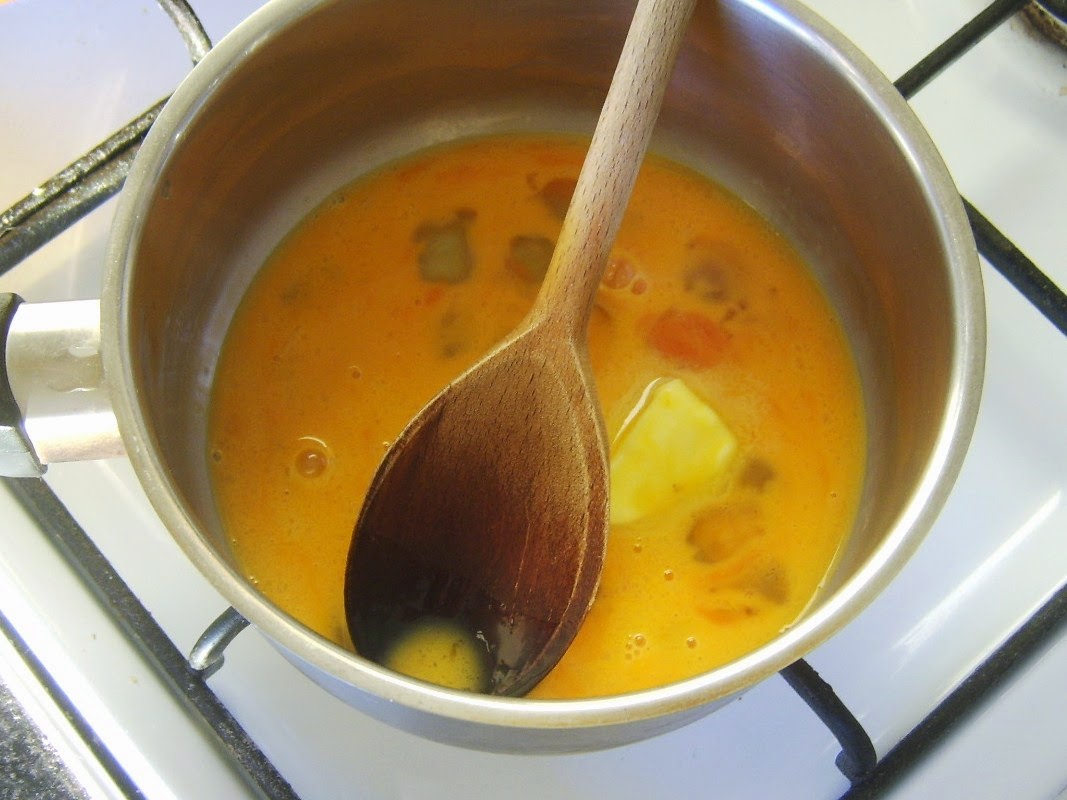
Starting to scramble quail eggs

During one brief respite from the heat for the eggs, lift the sausages and potato skins to a plate covered with kitchen paper to drain.

Potato skins and sausages are drained on kitchen paper

When the quail eggs are almost done, turn off the heat. Add the sausages, season with a little white pepper and carefully fold through to combine.

Wee Willie Winkie sausages are added to scrambled quail eggs

With the wooden spoon, spoon the quail eggs and sausages in to the centre of a deep serving plate.

Scrambled quail eggs and Wee Willie Winkie mini sausages

Season the potato skins with salt and malt vinegar and arrange attractively around the scrambled quail eggs and sausages. Garnish the eggs with the sliced basil leaves.

Potato skins are arranged around scrambled quail eggs and sausages

Thursday 28 August 2014

Tennent's Lager Battered Cod and Chips

Fresh cod fillet in Tennent's Lager batter with homemade chips

A fish supper (deep fried fish in batter with chips) bought from a fish and chip shop in Scotland will normally consist of haddock deep fried in a plain flour, water and salt batter. While I do love haddock, I've got to be honest in that personally I prefer cod (I actually genuinely do prefer the sustainable options represented by pollack or whiting to either - but that's another story for another day). Like many lovers of fish and chips prepared this way, I also like the fish fried in a good beer batter and what better to use for a Scottish fish and chips platter in the batter than Scotland's favourite lager, Tennent's.
 
Freshly caught cod

There is nothing better for fish and chips of course than freshly caught fish. This beautiful codling was caught from a charter boat out of Eyemouth on the East Coast of Scotland before being filleted at home for a late dinner.

Tools for filleting cod

When I'm filleting a fish like cod, I like to use scissors as well as a filleting knife, in order to remove the fins. This is of course optional. I also like to have a recyclable food bag at the ready for the bones and offcuts. Even where you are making fish stock from the head and bones, you still need to dispose of the fins and excess skin.

Note: Don't underestimate the importance of using a proper filleting knife. It really is essential if you're to do anything approaching a proper job.


Head is removed from cod prior to filleting

I start by cutting the head from the codling with my filleting knife, making a deep, semi-circular cut behind each pectoral fin, angled towards the head.

Fins are snipped from cod prior to filleting

The dorsal and anal fins are next to be removed. It's amazing how much easier it is to do this with scissors than with a knife.

Starting to remove first fillet from cod

Starting at the head end, make a slit immediately to one side of the backbone, letting the bones guide your knife and cutting always in the same direction, towards the tail. Remove the first fillet completely before following exactly the same procedure to remove the second.

Preparing to skin cod fillet

To skin the fillets, lay them one at a time - skin side down - on a chopping board, the narrow tail end nearest your weaker hand. Pinch tightly as close to the tail as you can and make a nick with the filleting knife through to the skin, angled away from your fingers. Turn the knife that it will slide over the skin and making steady sawing motions with the knife, pull the skin away from it.

Skinned fresh cod fillet

Skinning a fillet in this way is a lot less difficult than it sounds and with a little bit of practice, you'll soon be able to do it with ease. You can find these filleting and skinning instructions in much more detail (with lots more photos) on my cod recipes site.

Chips are deep fried for a second and final time

I like to make homemade chips by the three stage method of firstly parboiling, chilling, deep frying for the first time, chilling again and deep frying for a second time. You can of course use any method you choose - and even use frozen chips if you wish!
 
Tennent's Lager batter ingredients

The batter for the cod should be prepared only at the last minute and while the chips are being given their final fry. For the batter for one fillet, I used three tablespoons of self-raising (self-rising) flour, a good pinch of salt and simply as much ice cold Tennent's Lager as was required. You won't need any more than around quarter of a can.

Preparing Tennent's Lager fish batter

Spoon the flour in to a suitable dish or bowl and add the salt.  Very slowly, start pouring in the lager as you whisk gently with a fork. You want a smooth batter the consistency of double (heavy) cream.

Tennent's Lager fish batter

Take the chips from your deep fryer or deep frying pan and sit on a plate covered with kitchen paper to drain.

Chips are drained on kitchen paper prior to being plated

Hold the batter dish in your weaker hand close to your deep fryer. Carefully draw the cod fillet through the batter to coat evenly. Very briefly, allow the excess to drip off before laying the fillet away from you in to the hot oil.

Deep frying cod fillet in Tennent's Lager batter

The time your fish takes to cook will depend on the size/thickness of the fillet. I gave this fish three minutes before turning it to fry for a couple of minutes on the second side. The key is to watch for the batter becoming beautifully golden.

Perfect plate for serving fish and chips

This is a dish I was given as a present earlier this year. You can easily see it is fish shaped but it's not so easy to see the fish scale pattern and even a fish eye in the appropriate place. Naturally, it's perfect for serving fish and chips!

Tennent's Lager battered cod fillet is drained on kitchen paper

Drain the deep fried fish fillet on kitchen paper, as you did with the chips.

Chips are plated and ready for fish

Lay the chips in/on your serving dish and the fish fillet on top. Garnish with a lemon wedge, a sprig of basil and serve with tartare sauce.

Tennent's Lager battered cod fillet is laid on bed of chips

Sunday 24 August 2014

Cider Poached Scottish Salmon and Quail Eggs Salad

Scottish salmon poached in cider is served with hard boiled quail eggs salad

Poaching is definitely my favourite way of cooking salmon. It is important, however, not to let the poaching liquid boil. The way I poach it is by adding the salmon to the cool liquid and seasonings, bringing it up to only the slightest signs of a simmer before turning the heat off to let the salmon cook to juicy, succulent perfection as the liquid cools. The seasonings you add to the liquid with the salmon are of course endlessly variable but this combination works - I believe - especially well.

Fresh Scottish salmon fillet

Ingredients (Serves One)

1 fresh salmon fillet, skin on
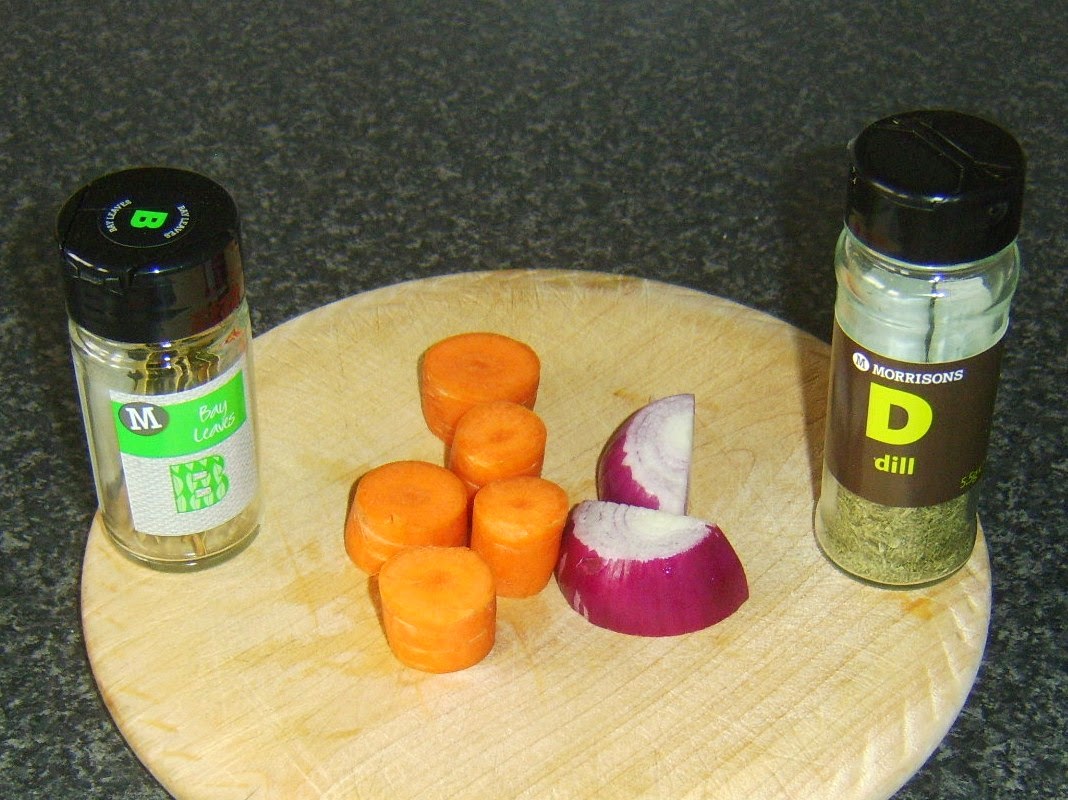
1 small carrot, washed, topped and roughly chopped
1/2 small red onion, peeled and roughly chopped
1 bay leaf
1/2 teaspoon dried dill
Salt
1/2 pint cider
1 pint cold water
4 fresh quail eggs
2 generous handfuls mixed salad leaves of choice
Fresh cress to garnish

Salmon poaching flavourings

Directions

Lay the salmon fillet skin side down in your poaching pot. Add the carrot, onion and herbs, seasoning further with a little bit of salt.
 
Salmon and poaching accompaniments

White wine would of course be a more common form of alcohol for incorporating in the poaching liquid. I happened to have some homemade cider available, however, which I had been given by a friend so I decided to give it a go. It definitely worked well, adding just that extra little welcome something to the final flavour of the salmon.

Homemade apple cider

Pour the cider over the salmon and add the cold water. Make sure that the salmon fillet is comfortably and fully covered. If not, add enough extra water to make this the case.

Salmon ready for poaching

Put the pot on a medium to high heat just until the liquid starts to simmer. It is imperative not to let it boil. As soon as this is the case, switch off the heat, lift the pot to a cool part of your hob or stove, cover and leave to cool completely. You're looking at an hour at least.

Isle of Gigha farmed quail eggs

Quail eggs are delicious little treats but the one drawback is that their size makes them a little bit awkward to deal with, however you choose to cook them. These eggs were bought from the Loch Fyne Oyster Bar and are actually farmed on the little Isle of Gigha off the Argyll coast.

Fresh quail eggs

I used four quail eggs here (reserving the others for different purposes) but you can use more or less if you wish.

Quail eggs ready for boiling

Sit the quail eggs in a small pot and pour in enough cold water to ensure they are covered by at least an inch of water. Put the pot on a medium to high heat until the water nears the boil. Reduce the heat to achieve a moderate simmer for two minutes.

Cooling boiled quail eggs

It's essential to cool the quail eggs quickly if they are not firstly to overcook, and secondly, develop that unattractive blue-grey tinge around the edges of the yolk. The first step for doing this is to take the pot straight to your sink when the eggs are done and run cold water in it until the eggs are cool enough to handle.

Very carefully, crack the shells on a hard surface all around. I used a wooden chopping board. You may also find it easier to actually peel the eggs while they are submerged in water. You can simply use the pot still in your sink. Take your time with this - especially if you've never done it before - as the eggs can easily be damaged. When the eggs are peeled, submerge them again in cold water for ten minutes to completely cool.

Hard boiled and peeled quail eggs

The salmon will not probably look too appetising at this stage but don't worry, that is soon rectified.

Cooled poached salmon

What you may find is that a large amount of the dill has stuck to the salmon fillet. Carefully wipe off the excess with your hand before lifting the salmon fillet to a plate.

Cider poached salmon fillet

The skin should easily peel off the salmon in one piece. It should now be discarded.

Skin should peel easily from cooled poached salmon fillet

Carefully flake the salmon with your fingers in to large pieces. You should also at this stage take the opportunity to feel for and remove any remaining bones.

Poached salmon is carefully flaked in to large pieces

Wash the salad leaves carefully in a colander under running cold water and shake dry. Arrange them in the bottom of your serving dish, seasoning them with a little salt as you do so.

Mixed salad leaves bed for salmon and quail eggs

Cut the quail eggs carefully in half and arrange with the salmon pieces over the salad at regular intervals. Garnish with the cress to serve.

Salmon and halved quail eggs are arranged on salad bed

Monday 18 August 2014

Stornoway White Pudding and Smoked Scottish Mussels

Smoked mussels on Stornoway white pudding with salad

Black pudding is popular throughout the UK and in many other countries in similar form, often under different names. While white pudding may not be so widely known, it is a very delicious alternative to black. Black pudding with scallops is a popular starter or appetizer in Scotland and it was that dish which inspired this creation. The Loch Fyne smoked mussels were part of the goodie bag gift I covered in my previous post and these were the last two pieces of genuine Stornoway white pudding I had in my freezer.

Stornoway white pudding

Ingredients (Serves One)

2 slices of Stornoway white pudding (fully defrosted, if applicable)
Oil for frying
Generous handful mixed salad leaves
6 Loch Fyne smoked mussels in vegetable oil
Couple of teaspoons of the oil from the mussels to dress the salad

Starting to fry white pudding

Directions

Pour a little oil in to a non-stick frying pan and bring it up to a medium heat. Lay the white pudding slices in the pan to fry over a low to medium heat.

Salad is carefully washed under running cold water

Put the salad in to a colander and wash thoroughly under running cold water. Shake dry.

White pudding is turned to fry on second side

After four or five minutes, turn the white pudding to fry for a similar period of time on the second side.

Loch Fyne smoked mussels

Lay the fried white pudding slices on a serving plate.

White pudding is plated

Carefully arrange three smoked mussels on top of each slice of white pudding.

Smoked mussels are arranged on top of white pudding

Arrange the salad leaves on the plate and drizzle with a little of the mussels oil.

Enjoying Loch Fyne smoked mussels on Stornoway white pudding