Saturday 20 December 2014

Choc Chip Cookie and Mincemeat Iced Christmas Treats

Choc chip cookie base is topped with mincemeat and icing

Mince pies (or mincemeat pies, whichever you choose to call them) are one of the most popular foods associated with Christmas in Scotland and the UK as a whole. They are bought individually from baker's shops, in packs from supermarkets and very frequently assembled and baked at home. If, however, you are looking for something a little bit different this year to make with your mincemeat, you may wish to give these ultra sweet Christmas treats a go. They could even be made to represent an excellent way of using up any extra mincemeat you have leftover after you've made your pies.

Choc chip cookies

It's notoriously difficult to give precise ingredient quantities for a bit of a mish-mash of a recipe such as this one. The size of the cookies, the size of your ramekins and more will all prove variables but I have done as best I can below. Do be prepared to add/remove a little bit here and there as necessary. The ramekins I've used here were three and a half inches (nine centimetres) in diameter.

Ingredients (Makes 4 Iced Christmas Treats)

10 medium sized choc chip cookies
3 ounces (75g) unsalted butter
3 tablespoons mincemeat
2 tablespoons icing sugar (confectioners' sugar, USA)
Cold water as required

Choc chip cookies are crushed with a rolling pin

Directions

If you wish, you could grind the cookies in a food processor or similar. I prefer to go down the old fashioned route and crush them two at a time with a rolling pin on a chopping board.

Crumbled choc chip cookies

Carefully scrape all the crumbled cookies in to a large glass or stone bowl.

Gently melting butter in a saucepan

Put the butter in to a saucepan and very gently melt.

Ramekins are lined with clingfilm

Line the ramekins individually with clingfilm. Make sure you have a good overhang in each instance. This step is essential for when it comes to removing the assembled treats from the dishes.

Melted butter is poured in to crumbled choc chip cookies

Pour the melted butter carefully in to the choc chip cookie crumbs.

Butter and crumbled choc chip cookies combined

Stir with a wooden spoon until all the butter is combined.

Choc chip cookie base is pressed in to ramekins

Use a teaspoon to divide the choc chip cookie mix between the ramekins, patting down fairly firmly with the back of the spoon to smooth and compress. Each ramekin should be slightly less than half full. Put the ramekins in the fridge for at least an hour to set the mixture. They could quite easily be left overnight at this stage if that suits your schedule better.

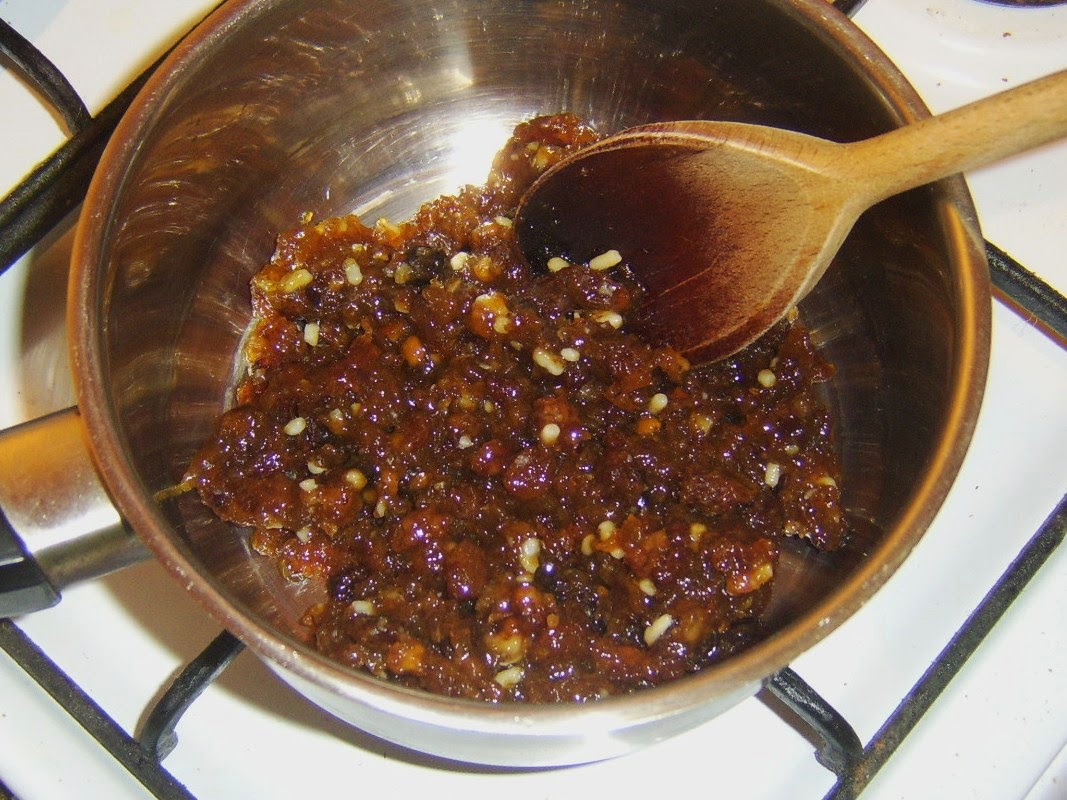
Gently heating mincemeat to make it more easily workable

It's not absolutely essential but I find that if you heat the mincemeat very slightly, it makes it much easier to evenly spread over the choc chip base. Do be careful not to heat it too much however as you don't want to melt the bases. About a minute at most on a very low heat should make it considerably more workable.

Choc chip cookie base has been set in fridge

Take the ramekins from the fridge while your mincemeat is gently heating. The bases should be set fairly firmly.

Mincemeat topping is added to choc chip cookie bases

Divide the mincemeat between the ramekins and smooth with the back of a spoon. The ramekins should be between half and quarter an inch from being full. Return to the fridge for a minimum of a further hour.

Icing sugar

Put the icing sugar in to a flat bottomed bowl. It's vital to have close control over how much water you're adding so you may want to start by part filling a small jug, such as a milk jug.

Icing sugar is mixed with water to form thick paste

Very slowly, start adding water to the sugar, a little at a time, stirring as you do so. The sugar paste needs to be very thick, almost like a dough. If you accidentally add too much water, simply add a little more icing sugar.

Icing is spread on top of mincemeat

Spoon the icing on top of the mincemeat to fill the ramekins and smooth. Refrigerate again until set.

The treats are removed from the ramekins one by one by carefully but firmly and steadily lifting the edges of the clingfilm. As you peel the clingfilm away, some of the icing may be disturbed but you can smooth the edges with a knife blade dipped in hot water. Let the treats sit at room temperature for fifteen minutes before tucking in.

Removing clingfilm from iced Christmas treat

Tuesday 9 December 2014

Scottish Venison Grillsteaks with Roasted Mediterranean Vegetables

Venison grillsteaks with roasted mixed vegetables and bruschetta

When I go food shopping, I usually take a list of what I need, or I at least know roughly what I'm looking to buy and prepare for my dinner. Occasionally, however, I simply can't decide on anything and choose to visit the supermarket with an open mind and simply see what catches my eye. That was precisely how this meal came about on Sunday night and I am so glad it did. I will definitely be making this again soon. It was not only incredibly delicious and enjoyable, it was extremely easy to make, as much of the preparation work had already been done.

Scottish venison grillsteaks and assorted Mediterranean vegetables

Ingredients per Person

2 Scottish venison grillsteaks
1 pack of ready to roast assorted Mediterranean style vegetables
Extra virgin olive oil
Salt and pepper
Vegetable oil
2 diagonal slices from French bread stick
1 clove of garlic, peeled and crushed
Chopped chives to garnish

Oiled and seasoned vegetables ready for roasting

Directions

If you buy vegetables oven ready in this way, do consult the instructions on the pack. This was how I was directed to cook them in this particular instance.

The oven had to be preheated to 220C/450F/Gas mark 8.

The vegetables were drizzled with extra virgin olive oil and seasoned with salt and pepper. They then went in to the oven for half an hour.

Venison grillsteaks are oiled for griddling

You could fry the grillsteaks in an ordinary frying pan or of course grill them but I like the presentation of steaks which have been cooked on a cast iron griddle pan. The first step is to get your pan on to reach a smoking hot heat and to brush the venison steaks lightly on both sides with vegetable oil.

Venison grillsteaks are added to searingly hot griddle pan

When the griddle is ultra hot, use cooking tongs to lift the venison steaks on to the hot surface and leave to cook for three minutes.

Venison grillsteaks are turned in griddle pan

Turn the steaks to fry for three minutes on their second side.

Venison grillsteaks removed to warm plate to rest

Lift the venison steaks to a heated plate, cover with tinfoil and leave to rest for five minutes.

Roasted Mediterranean vegetables

Take the roasted vegetables from the oven.

Bread is sliced for bruschetta

Toast the slices of bread until golden on both sides. Rub on the top side with the crushed garlic clove.

Garlic is rubbed on hot toast

Drizzle the toast with extra virgin olive oil and season with salt and black pepper.

Freshly prepared bruschetta

Use a slotted spoon to lift the vegetables on to a serving plate and arrange as a bed for the venison steaks.

Roasted mixed vegetables are plated as a bed for the venison grillsteaks

Take the foil cover off the steaks and lift them on to the bed of roasted vegetables.

Venison grillsteaks are laid on bed of Mediterranean vegetables

Garnish the steaks with the freshly chopped chives. Although I say chopped chives, I do however actually snip them with scissors - it's much easier.

Chives are scattered over venison steaks and vegetables

Plate the bruschetta on the edges of the plate and tuck in to a Scottish Mediterranean feast...

Cutting in to succulent Scottish venison grillsteak

Friday 5 December 2014

Scottish Shepherd's Pie with Diced Scotch Lamb and Clapshot

Scottish themed shepherd's pie with carrots and sprouts

Shepherd's pie in modern times is almost always made using minced (ground) lamb. When the concept first evolved, however - in the form of what was called cottage pie - it was made using the cheaper, lower quality offcuts of meat, pretty much in a similar way to Scottish stovies. Also in the present day, shepherd's pies are often bought ready made rather than prepared at home from scratch, frequently designed simply to be stuck in a microwave, ready in a jiffy and a ping.

In this recipe, I've tried to take shepherd's pie back to its proud, simplest, earliest origins. I can't help but feel that sometimes in the present day the ingredients list for what should be a very simple creation reads like a weekly shopping list! I have at the same time tried to give it a very Scottish twist. I have used diced Scotch lamb for the filling and made the classic Scottish creation that is clapshot to top the pie, rather than simply using mashed potato.  I've prepared this dish as an individual pie for one but you could of course increase the quantites proportionately and make a larger, more traditional sized pie. The suggested serving vegetables can also be varied according to taste or preference.

Scotch lamb, potatoes and turnip for shepherd's pie

Ingredients (Serves One)

1/2 pound (225g) diced Scotch lamb
1/4 medium Swede turnip (rutabaga)
2 medium baking potatoes
1/2 small white onion, peeled and sliced
2 tablespoons vegetable oil
Salt and black pepper
3/4 pint approximately fresh chicken or lamb stock
1 ounce (25g) butter for clapshot plus extra for sprouts
White pepper
2 teaspoons freshly chopped chives
1 medium carrot
6 or 7 Brussels sprouts

Starting to brown seasoned lamb with onions

Directions

Pour the oil in to a medium saucepan and add the lamb and sliced onion. Season with black pepper.

Browned lamb and softened onion

Set the heat to medium and stir with a wooden spoon to evenly brown the lamb and soften the onion. This should only take a couple of minutes.

Chicken stock is added to sealed lamb

Pour the stock in to the pot and bring to a gentle simmer. Cover and simmer as gently as possible until the lamb is tender. This took forty-five minutes in this instance. When done, turn off the heat and leave to cool.

Potato and turnip ready for boiling

Peel and roughly chop the turnip and potatoes. Add to a pot of cold salted water and bring to a simmer until softened. Twenty to twenty-five minutes should do it.

Drained potato and turnip is allowed to steam for a few minutes

When you drain the potatoes and turnip, it is vital that you return them to the pot and leave them to steam off for four or five minutes before you attempt to mash them. If you don't do this, there will be too much moisture in your clapshot and it will be soggy.

Butter, white pepper and chives for clapshot

Add the butter to the turnip and potato and season with white pepper. Mash with a hand masher.

Mashing potato and turnip with butter and white pepper

The easiest way to chop the chives is with scissors. This should be done at the very last minute.

Chopped chives are added to mashed potato and turnip

Add the chives to the mash and stir with a spoon. Cover the pot and set aside to cool.

Lamb and onion shepherd's pie filling

When the lamb is cool, put your oven on to preheat to 190C/375F/Gas mark 5. Use a slotted spoon to transfer the lamb and onion to a suitable dish before spooning in a little of the stock only.

Clapshot is carefully spooned on to cooled lamb

I used a teaspoon to add the clapshot to the top of the lamb in clumps. In a bigger serving, you could use a dessert spoon. What this does is help you avoid mixing the clapshot in to the lamb.

Scottish shepherd's pie ready for the oven

Sit the dish on a baking tray and heat in the oven for twenty minutes.

Starting to cook carrots

The carrot was scrubbed, topped and tailed and sliced in to discs, which were added to cold, salted water. The water was brought to a simmer for about ten minutes until the carrots start to soften.

Sprouts are added to boiling water

The sprouts go in to boiling salted water for six to eight minutes, depending upon their size.

Butter is added to drained sprouts

There are any number of flavourants I often add both to carrots and sprouts but in this instance, I drained them and added a little butter only.

Orkney Dark Island Ale was served with Scottish shepherd's pie

Use oven gloves to lift the shepherd's pie to a serving plate and spoon the vegetables and sprouts alongside. I enjoyed this with a bottle of Orkney Dark Island Ale.

Tucking in to Scottish shepherd's pie

Tuesday 2 December 2014

Roast Venison Haunch with Clapshot and Red Onion Gravy

Roast venison haunch with onion gravy, clapshot and peas

This home cooked meal is very different from ones which I usually write about. That is because it is one in which I only had a very small hand in the cooking process, instead being largely free as a house visitor to enjoy a beer or two as I watched everything come together. The main focus of the meal was a beautiful big five or six pound venison haunch which was to be roasted and enjoyed with some clapshot, peas and red onion gravy.

Bone in venison haunch joint

The venison had been frozen so it had been carefully defrosted in the fridge over the course of a couple of days. The cooking time I'm told was then calculated using the format/equation of firstly 30 minutes at 220C/450F/Gas mark 8, followed by 12 minutes per 500g at 170C/350F/Gas Mark 3.  I don't use metric (only imperial) but I wasn't responsible for the cooking, so didn't need to perform the necessary conversion calculations.

Butter is rubbed on to the venison haunch

While the oven was preheating, the venison was washed, patted dry with kitchen paper and laid on a lightly oiled deep roasting tray. It was then liberally rubbed with butter before the tray was covered with a large sheet of tinfoil.

Vension haunch is covered with tinfoil for roasting

The venison went in to the oven for the allotted period of time (best part of two hours, I think) and it was time for a couple of beers or so.

Red onion is sliced for making gravy

When it was getting nearly time for the venison to come out of the oven, a red onion was peeled, halved and thinly sliced.

Red onion and sage is added to melted butter

Around 2 ounces (50g) of butter was melted in a saucepan before the onion was added with half a teaspoon of dried sage and the lid placed on top. The onion was left alone to slowly cook down and soften over a very gentle heat for ten minutes.

Swede turnip and potatoes for clapshot

Clapshot is in the first instance a combination of potatoes and turnip which are cooked and mashed. When this this prep was being done, I was surprised to see the cook for the day wasn't peeling the potatoes. I had never tried making clapshot with unpeeled potatoes before but the idea really did work and this is the way I'll make it in future.

The potatoes and turnip went in to a large pot of cold, salted water and the water was brought to a simmer for about fifteen to twenty minutes, just until softened.

Turnip and potatoes are peeled for making clapshot

When the venison came out of the oven, I thought it was definitely ready. A consensus of opinion, however, saw it put back in for a further ten minutes. This for me saw it being just that little bit overcooked, though it was still tender and absolutely delicious.

Roasted venison haunch is rested

The venison had to be recovered with foil and left to rest for fifteen minutes.

Roast vension haunch

The onion by this time was beautifully cooked down and softened. in the butter.

Red onions have cooked down in butter

The juices from the venison cooking tray went in to the pot with the onion and was brought to a strong simmer to reduce and thicken the gravy.

Venison juices are added to softened onions

The venison was then carved and it would easily have served six people generous portions.

Starting to carve venison

The potatoes and turnip were drained and left to steam for five minutes. If you don't let it steam before you add some butter and white pepper to mash, you will have a soggy and mushy clapshot.

Butter is added to potato and turnip for mashing

When the mashing was done, a tablespoon of freshly chopped chives was stirred through.

Chives are stirred through mashed potatoes and turnip

I actually managed to rescue the bone of the venison haunch before it was discarded. I took it home with me to make some fresh game stock!

Venison is carved and ready for plating

The red onion gravy was now lusciously thick and happily bubbling away.

Red onion gravy

The meal portions were plated up and we all tucked in and enjoyed, a couple of bottles of red wine of course helping everyhing go down just perfect.

Red wine is served with roast venison and clapshot